


Did you know that Amazon’s Alexa provides a hands-free interface that allows you to use your voice to create a lot of creative things? These built-in capabilities are referred to as skills. Per Amazon, “Alexa’s abilities include playing music from multiple providers, answering questions, providing weather forecasts, and querying Wikipedia.”
In this post, we are going to build a simple skill called “My Skill” using SnapLogic as a back-end. This easy exercise using SnapLogic pipelines and Amazon’s services will demonstrate how you can integrate Alexa to applications and data.
This skill will be able to handle two intents: “Hello World” and “Get Tweet about Person.” In the “Hello World” intent, Alexa will simply reply with a congratulations message constructed inside a SnapLogic pipeline. For the “Get Tweet about Person” intent, Alexa will ask the SnapLogic pipeline to find and report on a tweet related to a person you specify. Below is the step-by-step process on how we did it.
To complete this Alexa Skill, you will be working in the SnapLogic platform and the Amazon Developer Console to create three main components: SnapLogic Pipeline, Alexa Skill Interface, and Lambda Function. You don’t even need an Echo to test it – just the Amazon Developer Console will do.
Building a SnapLogic Pipeline
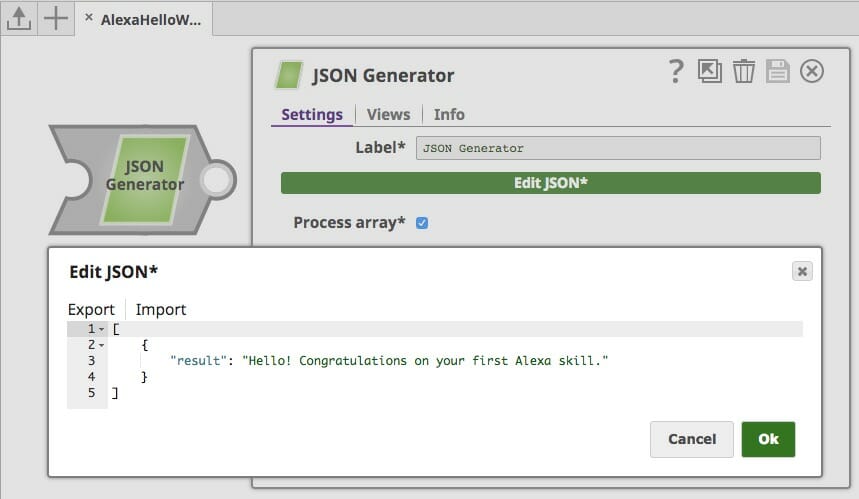
For now, we will only focus on making a skill with the “Hello World” intent. We will build “Get Tweet about Person” later. The SnapLogic pipeline receives no parameters and results in a “congratulations” message spoken by Alexa. This intent needs only one Snap to generate the resulting congratulations message. You can use either a JSON Generator, CSV Generator, or a Mapper Snap. You can download this SnapLogic pipeline here.
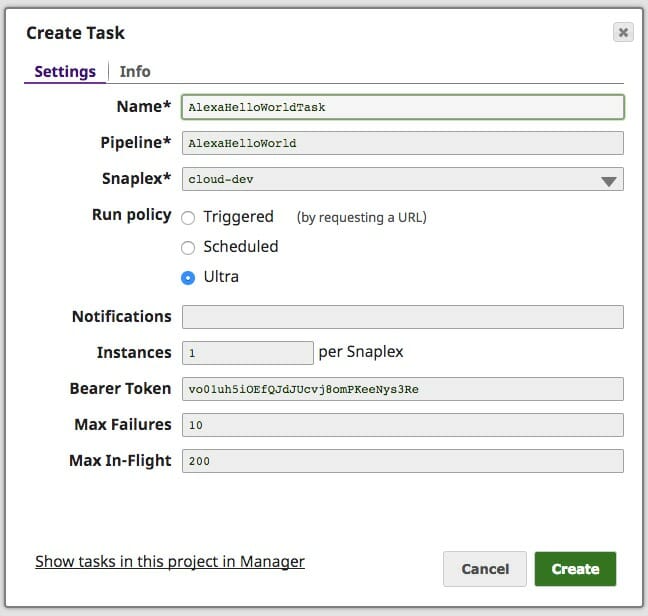
First, create a task, by clicking the calendar icon in the menu bar, so that this pipeline can be called with a REST API from Lambda. You can either choose Triggered or Ultra task. For this exercise, we will use Ultra task since it results in a shorter response time.
![]()
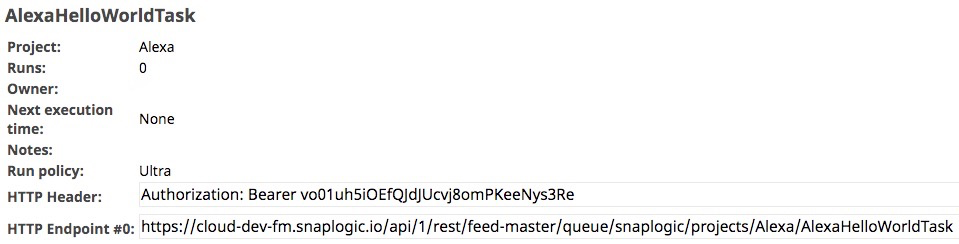
Next, go to the SnapLogic Manager page to see the details of the task. You will need the endpoint and authorization information so that Lambda can execute this task.
Creating the Alexa Skill Interface
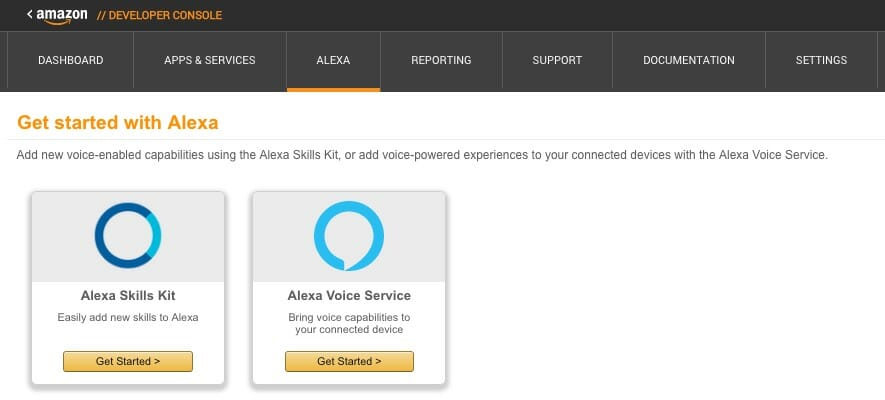
Now we’re ready for Alexa. Go to the Amazon Developer Console, then choose the Alexa tab.
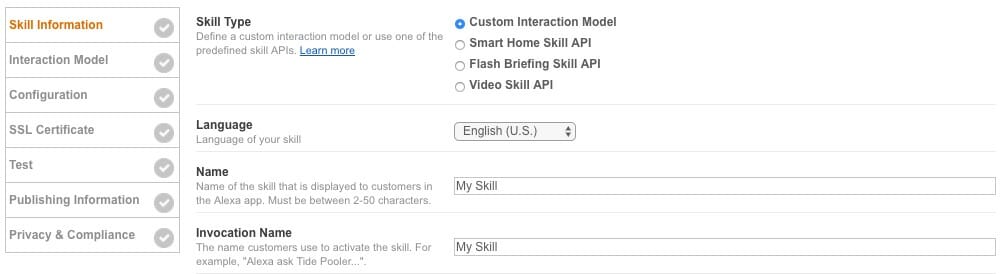
Click “Get Started” under “Alexa Skills Kit,” then click “Add a New Skill.” Fill in both the Skill Name and Invocation Name you want to use. The Skill Name is the name that will show up in the Alexa App. The Invocation Name is the phase that you will use to start the skill.
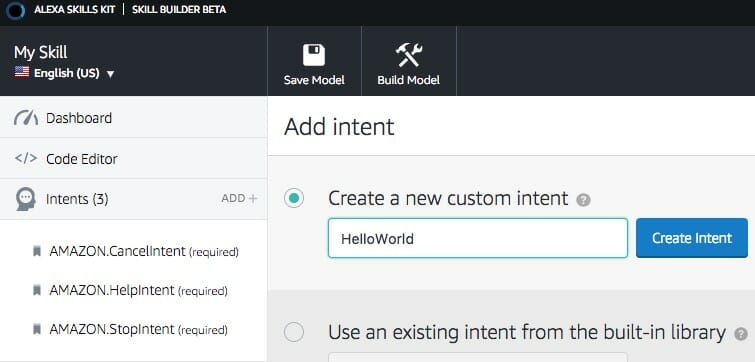
The next step is to design the interaction model. Click “ADD +” in the intents section and specify the intent name. An intent can be a question or command. In most scenarios, an intent will be mapped with one SnapLogic task.
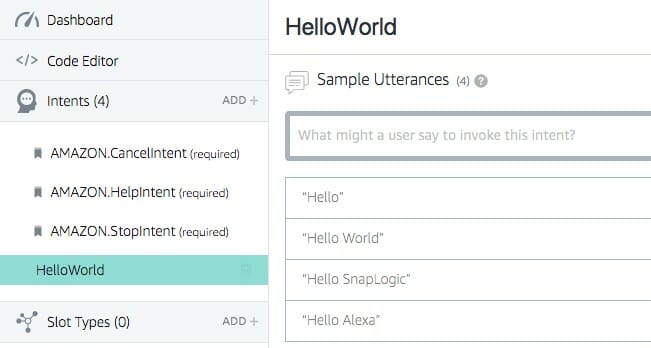
Add some sample utterances. You do not have to speak exact utterances to use the skill since Amazon provides a good NLP model that is quite flexible. Note: In our “Hello World” intent, we do not need to use a slot. (We will talk about slot later in our “Get Tweet about Person” intent lesson.)
Click “Build Model” and be aware that it may take a few minutes. Next, go to the configuration step to specify the ARN endpoint to Lambda Function, which we will create next.

Creating a Lambda Function
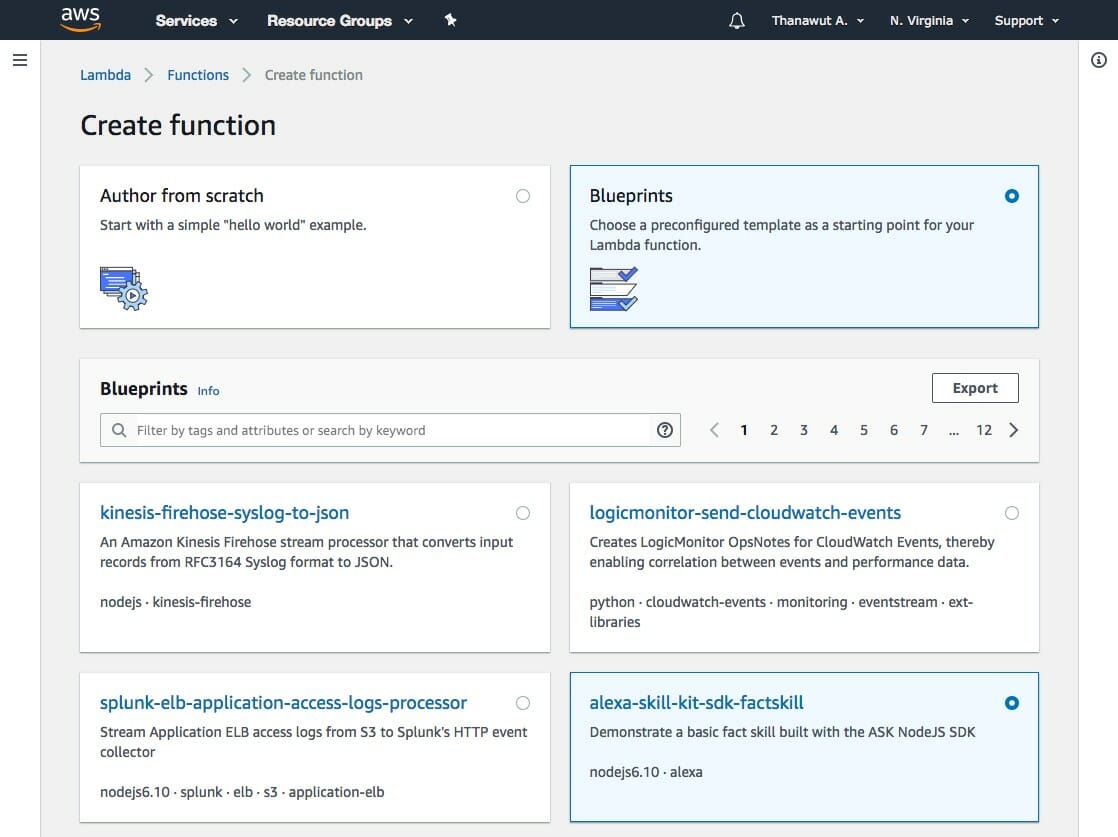
Go to the Lambda development console and click “Create function.” Select “alexa-skill-kit-sdk-factskill.”
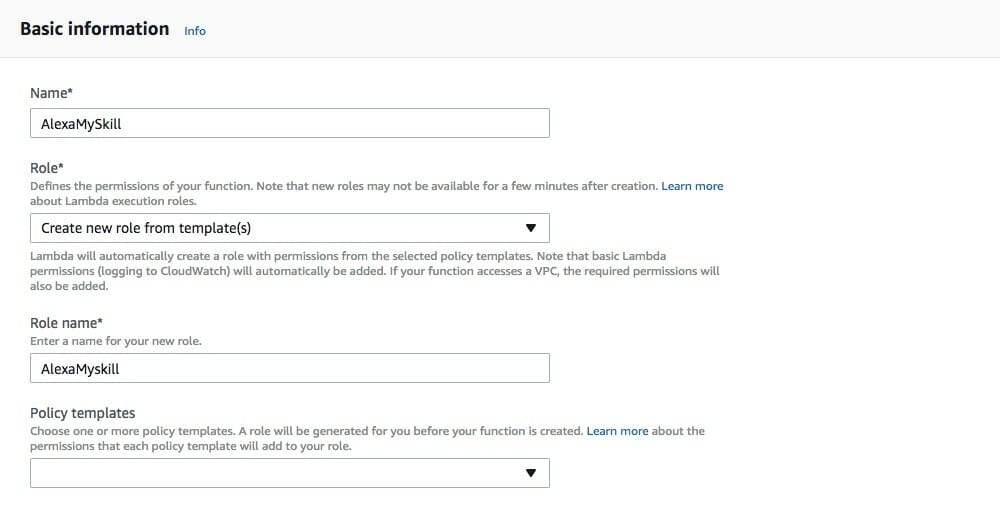
Fill in basic information per the screengrab below and click “Create function.”
You can now see the ARN endpoint you need for the Alexa configuration mentioned above.

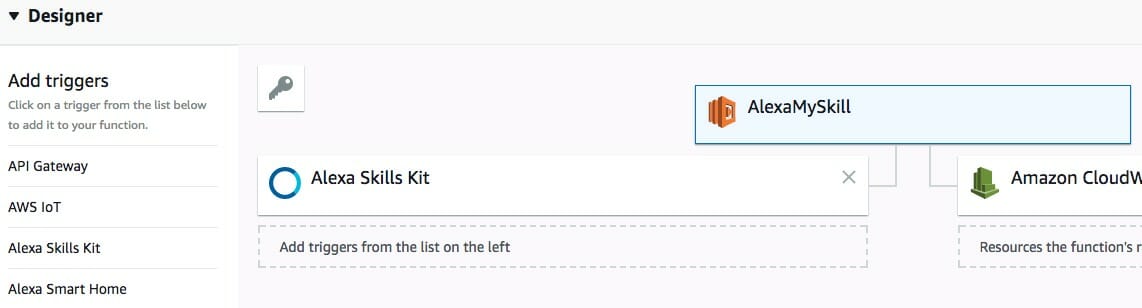
Make sure that the Alexa Skills Kit is included. If it’s not, add it from the left panel.
Next, replace the JavaScript content with our SnapLogic Lambda Template for Alexa Skill which can be found here. You can also download the complete code for this skill here.
Fill in your skill information.

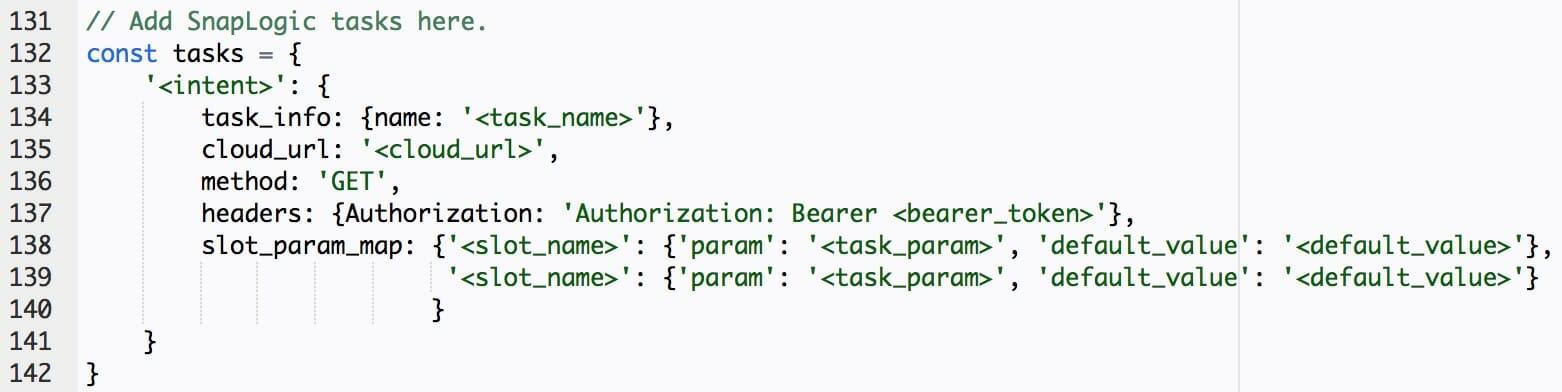
In the intent section. Fill in <intent> with the one you defined in the Alexa Skill Interface. If you have more than one intent, simply copy and paste with a different <intent>.

In this case, <intent> is “HelloWorld.”
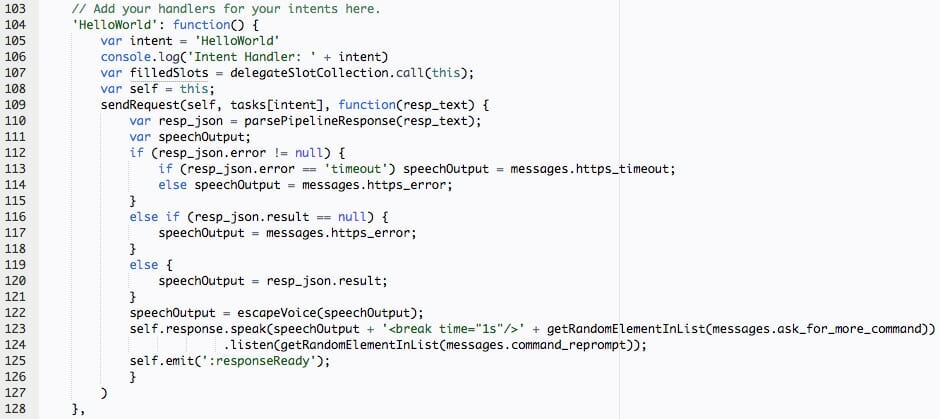
Then fill in the SnapLogic task information that you’d like to use with this intent. You can get <cloud_url> and <bearer_token> from the Triggered or Ultra task you started in SnapLogic. You do not need to fill in the slot section for this intent. When everything is ready, save the function.

Congratulations, your first Alexa Skill is complete!
Testing Your Skill
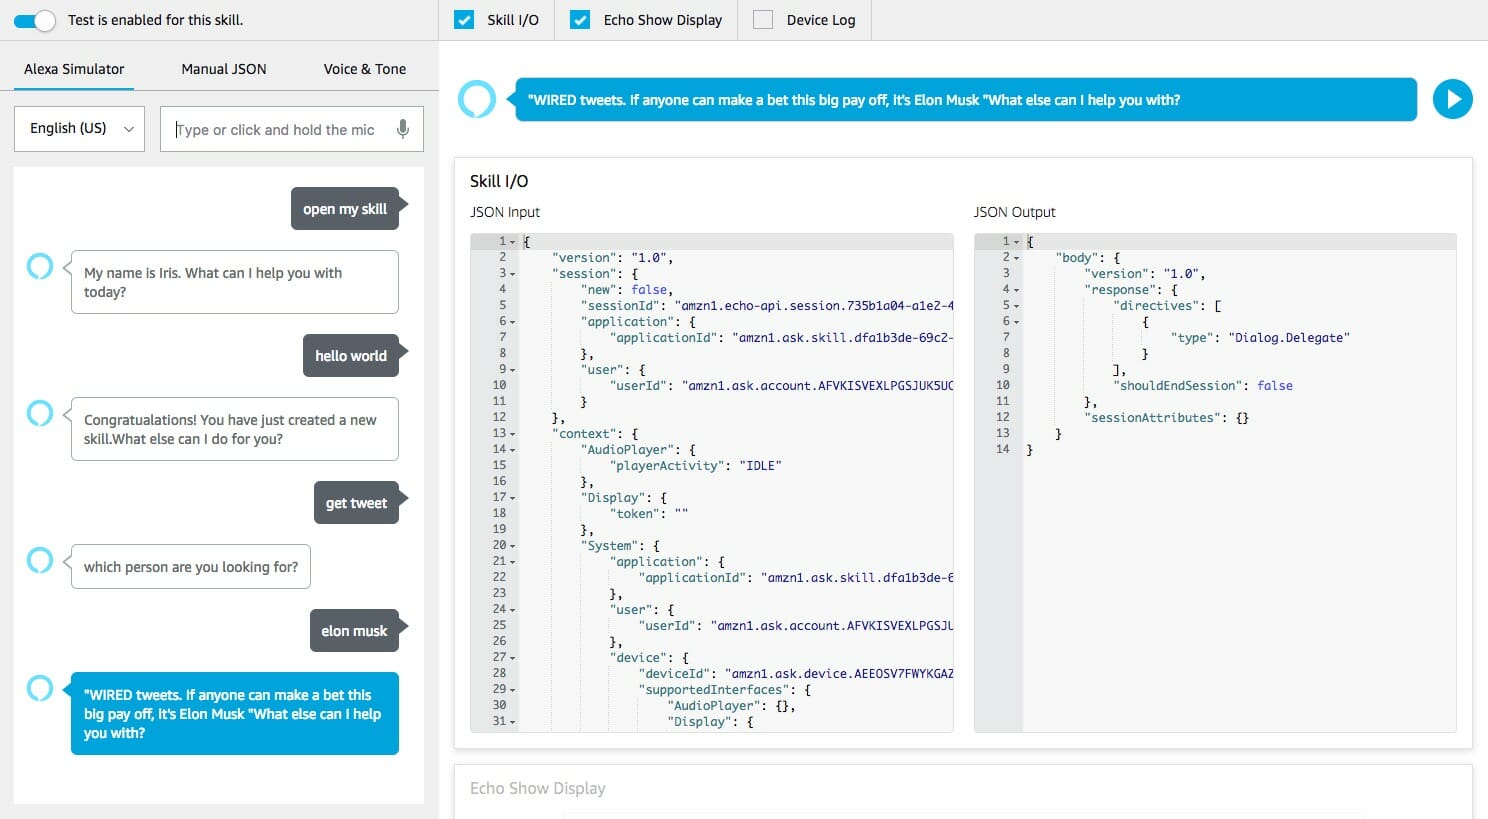
You can test your skill in either Alexa Development Console, the Amazon Shopping App, or Amazon Echo. For this exercise, we will be testing in the Alexa Development Console.
Go to “Test” section, click “Go to Test Simulator.” You can either type in or speak the request. Your conversations with Alexa will be shown on the left panel. On the right side, the request from the Alexa Skill Interface in json format will be shown on the left half and the response from Lambda will be displayed on the right half. You can click the play button to hear Alexa’s voice.

Building the “Get Tweet about Person” Intent
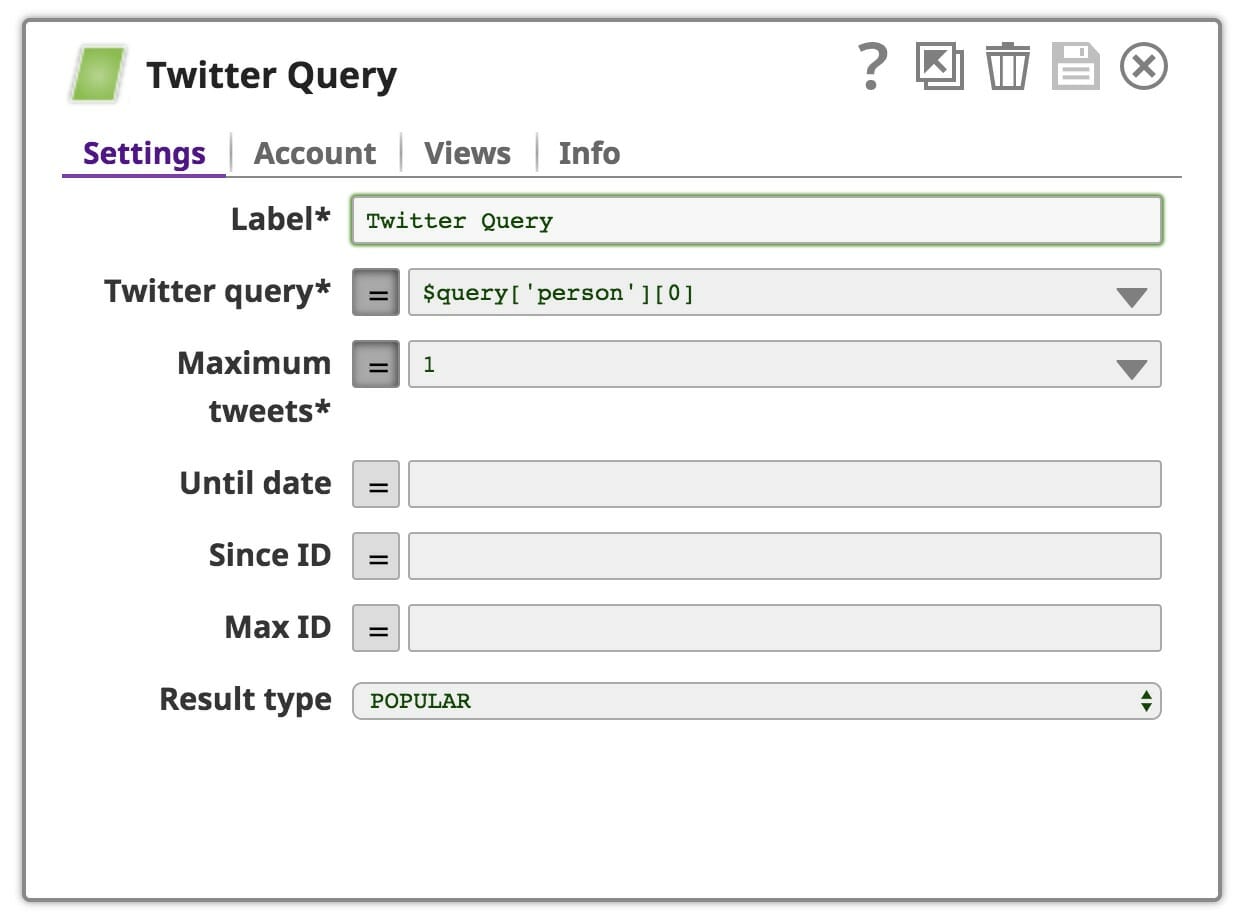
Start off with the following pipeline. This pipeline contains three Snaps: a query snap from the Twitter Snap Pack, a mapper to extract username and text from the Twitter response, and the last mapper for constructing the sentence that Alexa will read out. You can download this SnapLogic pipeline here.

In the Query Snap, the query word will be the person’s name that you tell Alexa. For the Ultra task, parameters (slots) from Alexa will be packed into the “query” object. For the Triggered task, slots will be passed as pipeline parameters. Note: You will need to add your Twitter account to this Snap.
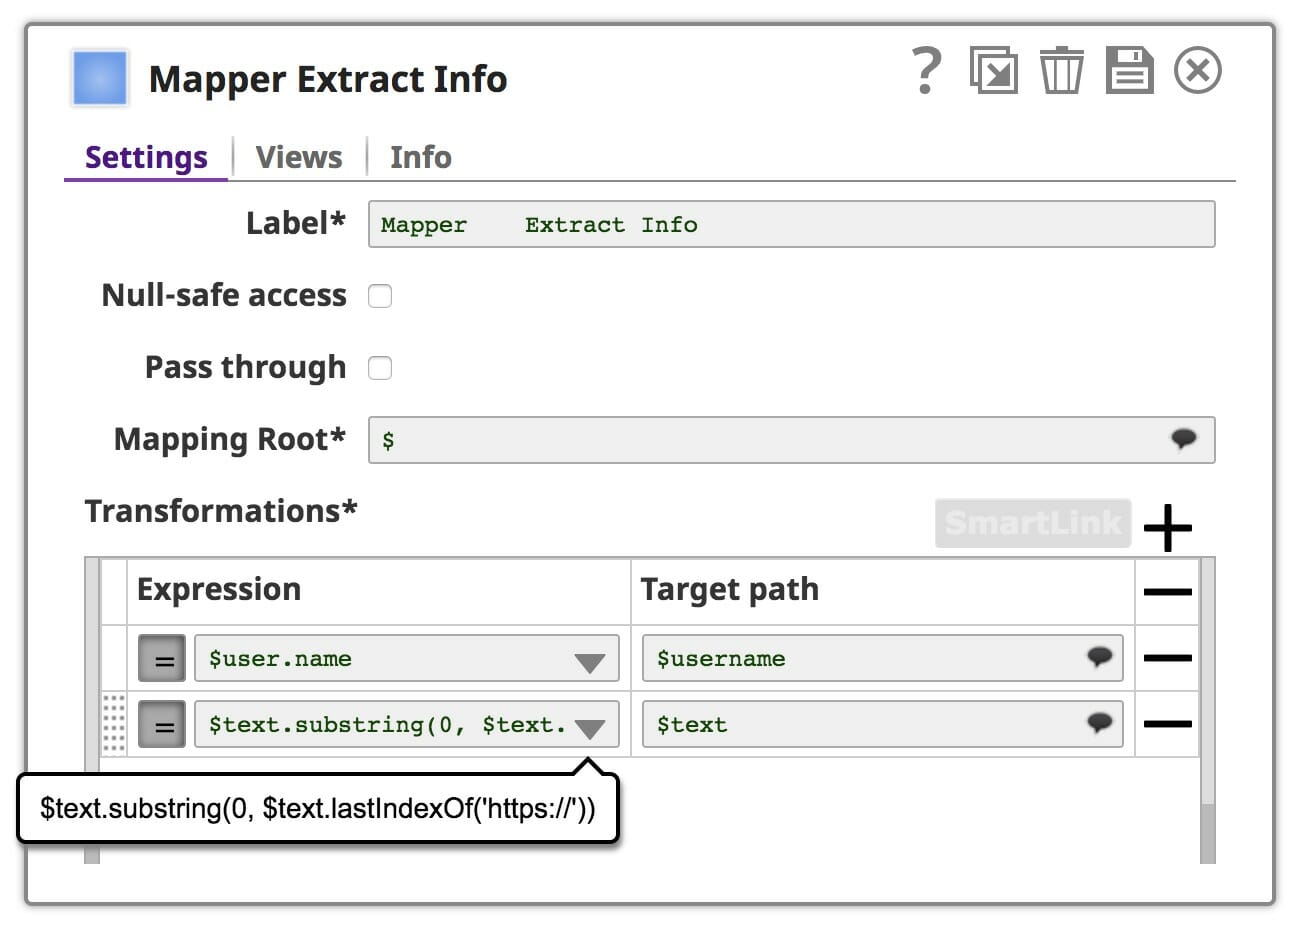
In the first Mapper Snap, we extract the username and text that we want Alexa to read. You may need to be careful about the API response from a third party. The response may contain unreadable text which you will need to remove or transform into readable text. For example, the Twitter API may send a link instead of full text if the tweet is really long. In this case, we may use SnapLogic expression language to handle it.
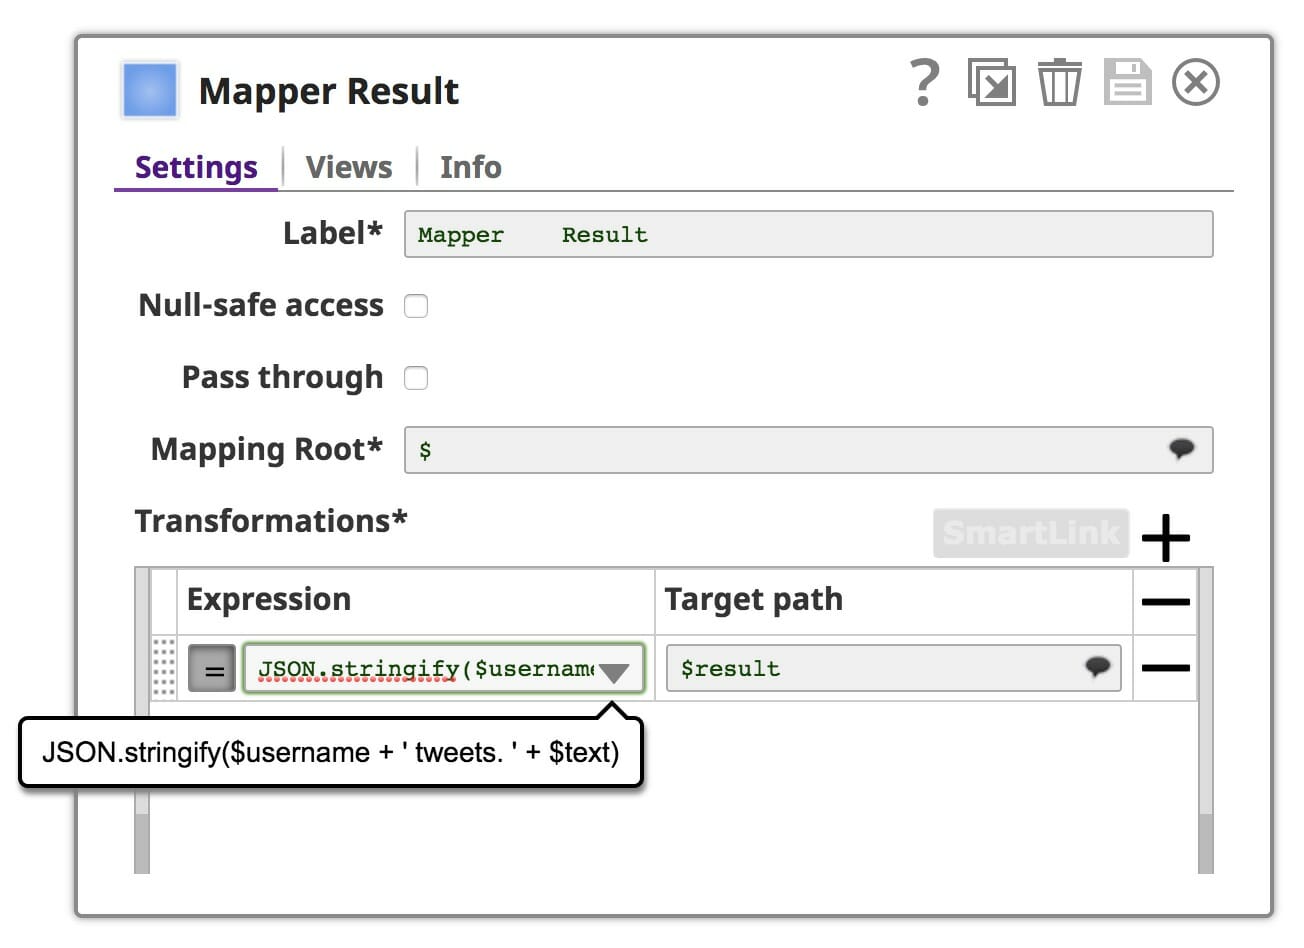
In the last Mapper Snap, we get to construct the sentence that we will send back to Alexa. Simply use “+” to concatenate strings, however, it is good practice to wrap your string under “JSON.stringify” to make sure that your response will be a valid json string.
Then you can start an Ultra task. The next step is to create “Get Tweet about Person” intent in the Alexa Interaction Model and add an intent handler in the Lambda Function.
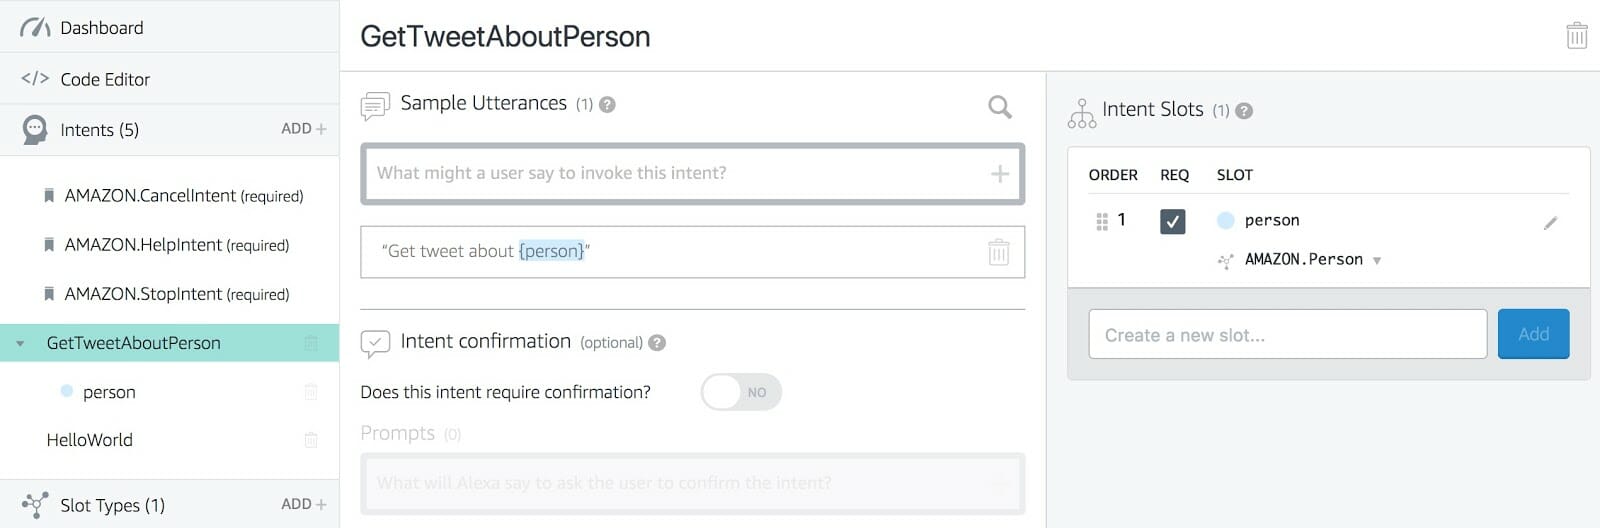
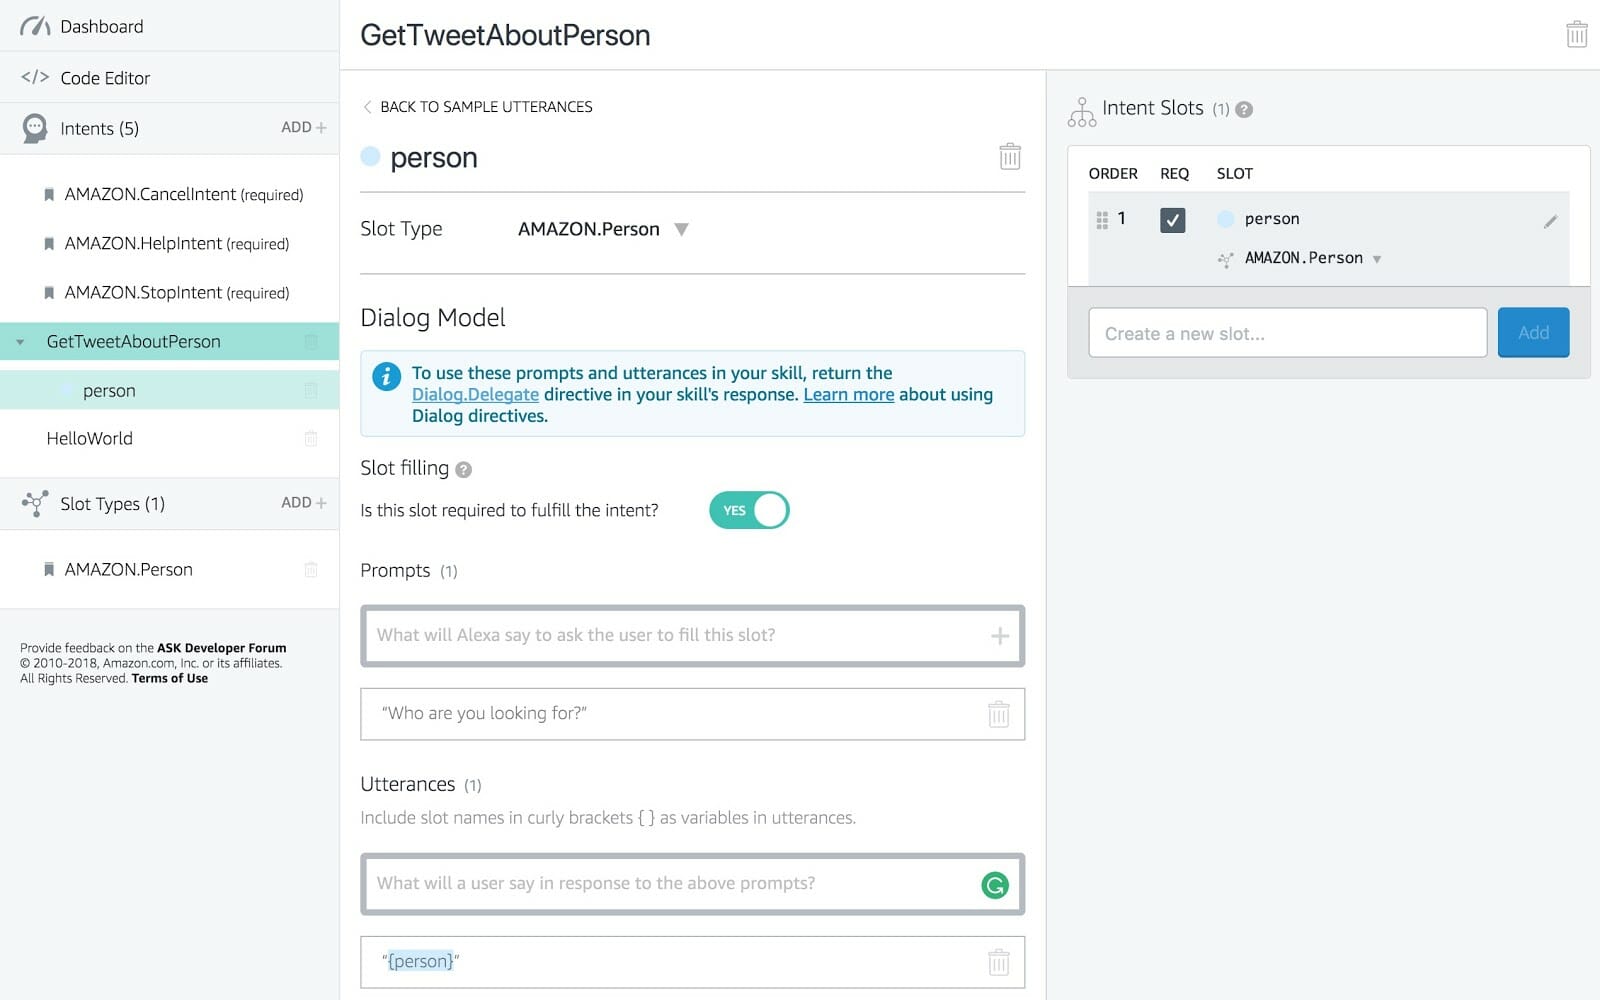
Go to the Alexa Interaction Model, create an intent, then, specify utterances. We will need a slot to capture a person’s name which will be passed to our Lambda Function. You can specify the slot using curly braces, for example, {person}. On the right panel, make sure “REG” is checked. It means that this slot is required and Alexa will ask if she cannot get the information for the required slots. For required slots, you will need to specify a prompt and sample utterances that you want Alexa to reply with. When everything is looking good, go ahead and build the model.
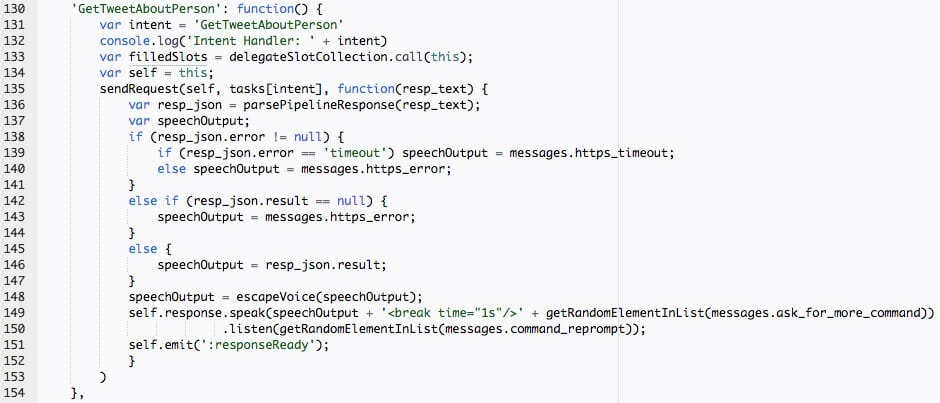
The last step is to add an intent handler to the Lambda Function. In this case, you will need to specify “slot_param_map.” It starts with <slot_name> which you can get from the Alexa Interaction Model. <task_param> is the same as specified in “query” object from the SnapLogic Twitter Snap. You do not need the default value here since the person’s name is a required slot. Alexa will keep asking until she gets the person’s name. Finally, click “save” and your skill is ready to go.

And that’s it. You’ve now created your first skill using a SnapLogic pipeline and Alexa, just another way to highlight the unique power of the SnapLogic architecture.
Maybe one day you can ask Alexa “Alexa, get the data from Sumo Logic and send to our data lake.” Alexa will then trigger the pipeline that does data integration and send a confirmation email when the task is completed. Nice, huh? What you do next is up to you. The possibilities are endless.
What will be your first Alexa Skill?