


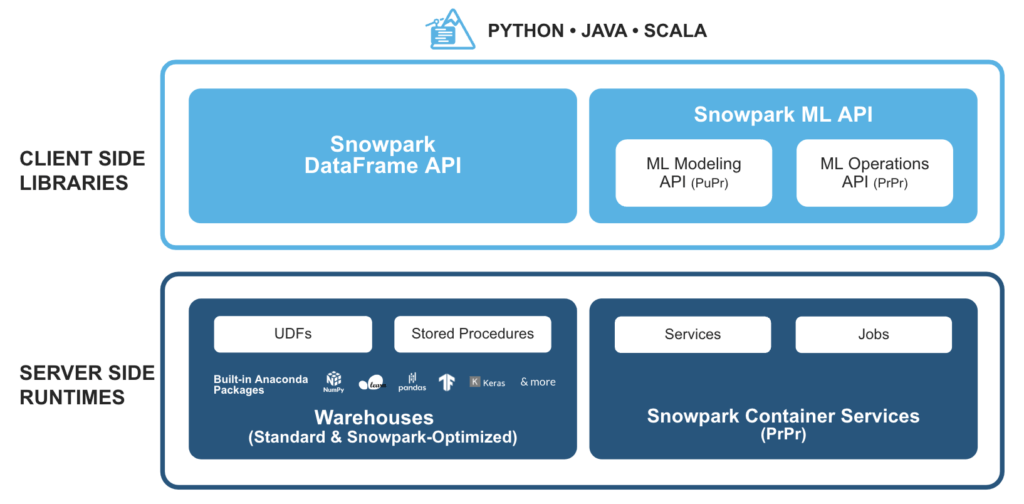
Snowpark is a set of libraries and runtimes in the Snowflake cloud data platform that enable developers to securely process non-SQL Python, Java or Scala code, without data movement in Snowflake’s elastic processing engine.
This allows the querying and processing of data, at scale, in Snowflake. Snowpark’s operations can be executed passively on the server, alleviating management costs and ensuring reliable performance.
How does Snowpark work with SnapLogic?
SnapLogic’s Intelligent Integration Platform (IIP) provides an easy way to leverage developer-built, custom user-defined functions (UDFs) for Snowpark. In addition, the Snowflake Snap Pack is used to implement advanced machine learning and data engineering use cases with Snowflake.
Snowpark and SnapLogic integration example
Let’s examine the steps to invoke Snowpark libraries using the Remote Python Script Snap in SnapLogic:
Step 1: Read sample rows from a source (a CSV generator in this case)
Step 2: Use the Remote Python Script Snap to:
- Invoke the Snowpark Python libraries
- Perform additional operations on the source data rows
Step 3: Load the processed data into a target Snowflake table

SnapLogic IIP configurations
On the SnapLogic side, the Remote Python Executor (RPE) will need to be installed using the following steps:
Steps 1 and 2: The first two steps for installing the RPE are explained in detail in the SnapLogic IIP documentation. The default RPE access port is 5301 so “inbound communication” must be enabled on this port.
- If the Snaplex instance is a Groundplex, the RPE can be installed as the same Snaplex node
- If the Snaplex instance is a Cloudplex, the RPE can be installed as any other remote node accessible by the Snaplex
Step 3: The next step requires installing the custom RPE package by following the steps under the “custom image” section of the documentation. To install the Snowpark libraries on the node, update the requirements.txt file as below:
requirements.txtsnaplogicnumpy==1.22.1snowflake-snowpark-pythonsnowflake-snowpark-python[pandas]
The Snaplex instance in our example is a Cloudplex, and the remote node is an Azure Ubuntu VM. The custom RPE package is installed on the Azure VM.
Snowflake configurations
On the Snowflake side, we must set configurations and create a target table.
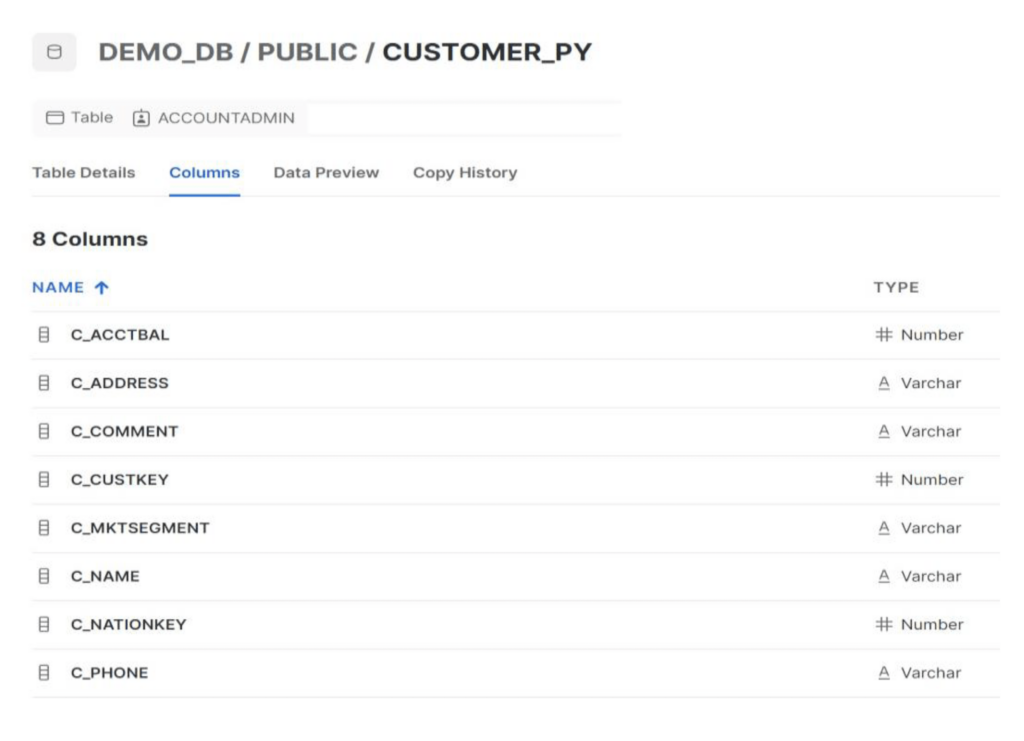
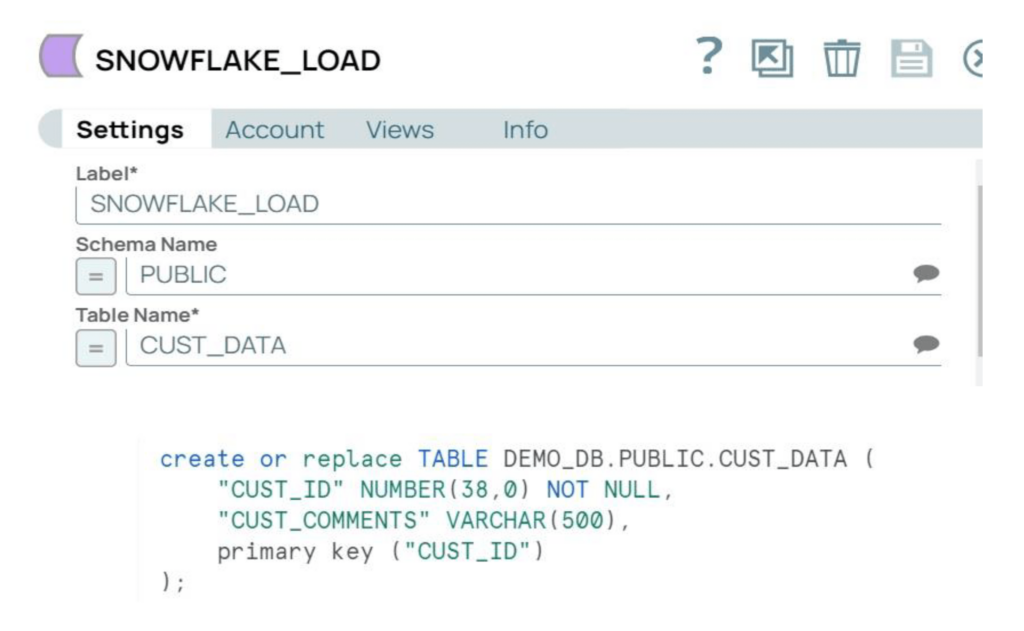
Step 1: Update the Snowflake “network policies” to allow the SnapLogic and RPE nodes. For this example, we’ll use the CUSTOMER_PY table under the Public schema.
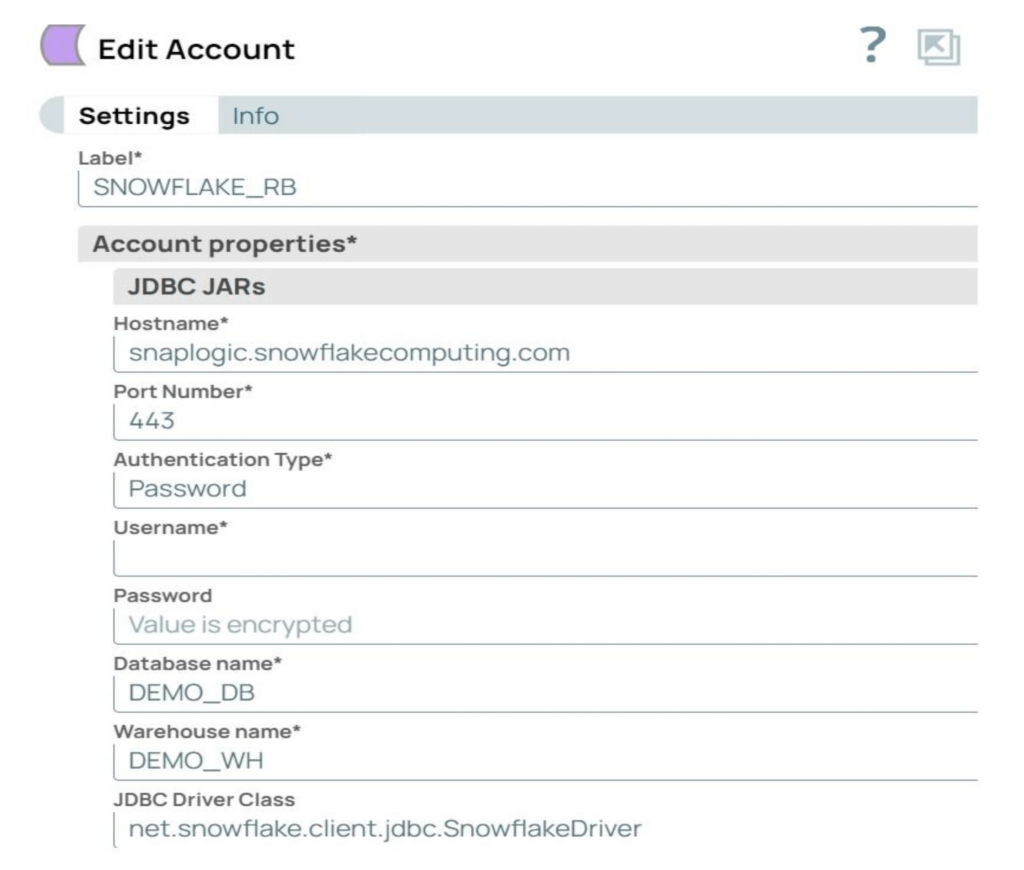
Step 2: Create the Snowflake account in SnapLogic with the required parameters. The account used in our example is a Snowflake S3 Database account.
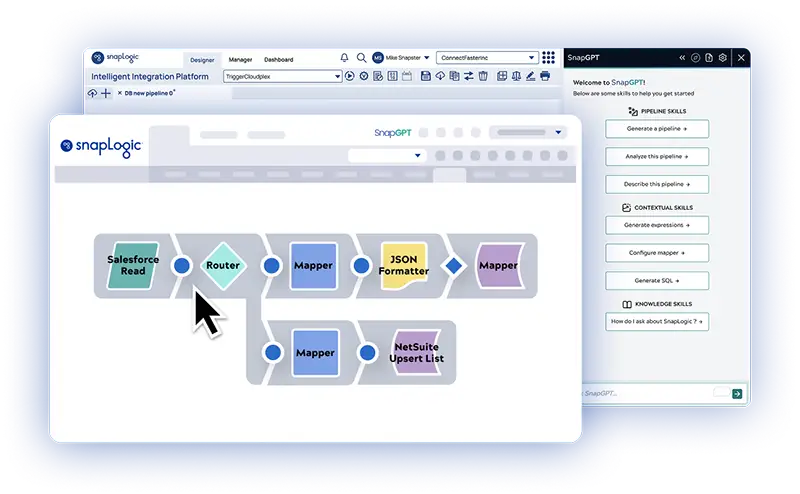
SnapLogic Pipeline flow (Remote_Python_Snowpark_Sample)
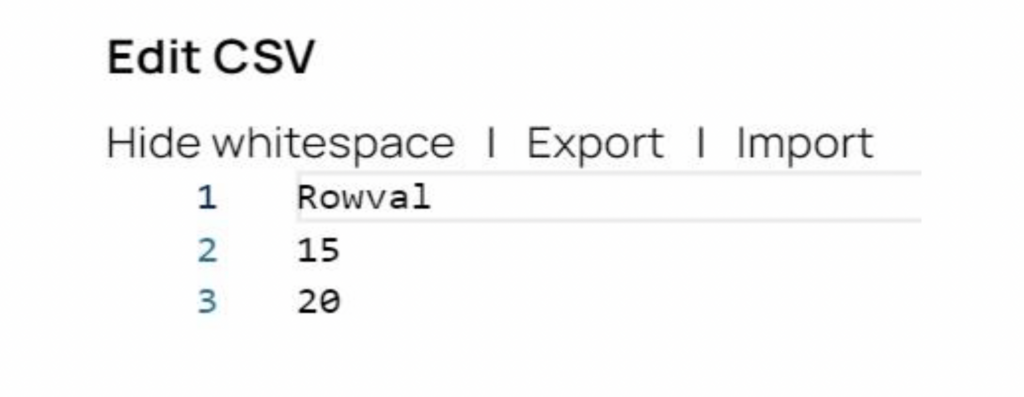
Step 1: The CSV Generator Snap generates the source data. For our example, there are two source records, with values of 15 and 20.
Step 2: The Remote Python Script Snap executes Python code to call the Snowpark Python libraries and perform additional operations on the source data rows. See snippet of the Python code below:
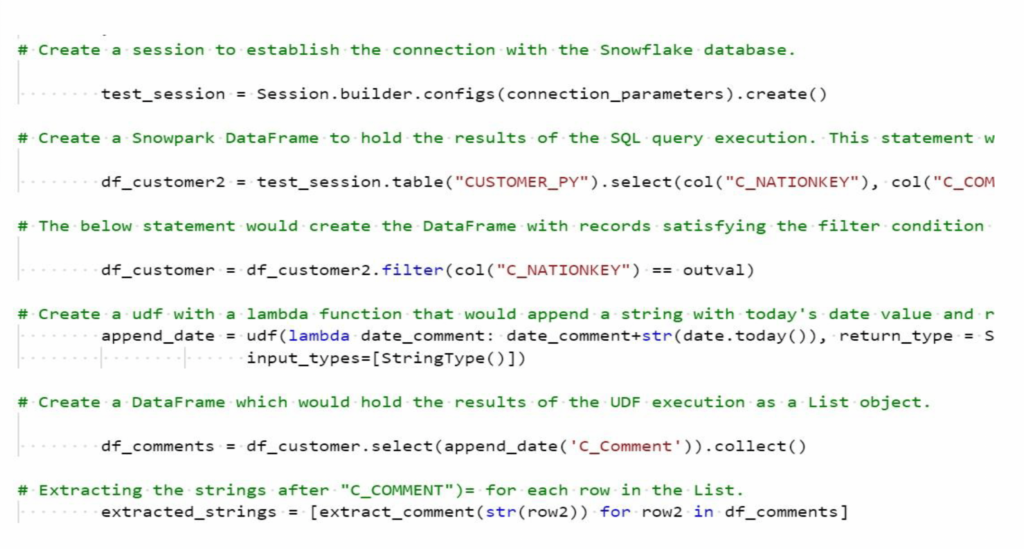
The Python code performs the following operations:
- Construct Snowpark DataFrames to retrieve data from the Snowflake tables. Filter records to fetch data for the C_NATIONKEY and the associated C_COMMENT column data for each input row from the Upstream Snap (from the CSV Generator)
- Create and execute a UDF to append the current timestamp to the related records in the C_COMMENT column. The sample UDF name is append_data.
- Return the values of C_NATIONKEY and the updated C_COMMENT records to the downstream Mapper Snap.
Step 3: Validate the SnapLogic Pipeline and resolve any validation errors.
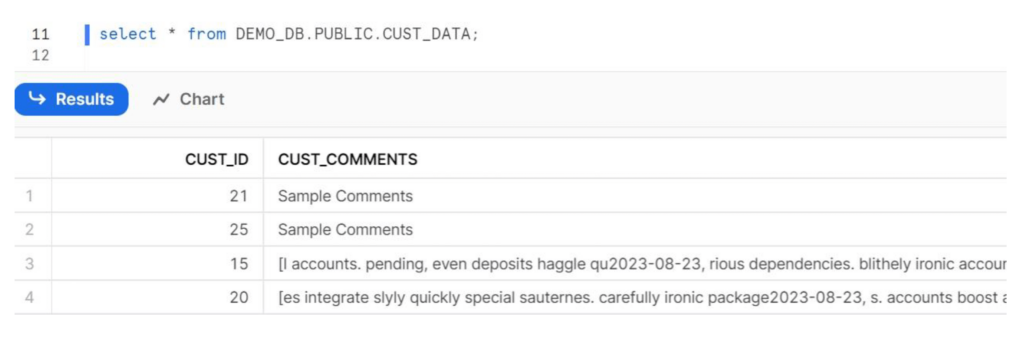
Step 4: Execute the Pipeline and verify the data in the target database on Snowflake.
Step 5: Congratulations, you’ve successfully integrated Snowpark and SnapLogic!
Additional references
Snowpark API documentation
Snowpark developer guide for Python
SnapLogic Remote Python Script Snap documentation
SnapLogic Pipeline export
Python code for the Remote Python Script Snap